Hello Savory Sweet-Hearts! We're kicking off our new series Recipe to Reality, where we will be recreating recipes we have found, and blogging our experiences. Inspired by the decadent black and white cookies that are a staple in delis, bakeries and more around the nation, this recipe was provided by "Bon Appétit" on epicurious.com. For the full recipe go here.
 |
Ready to Bake!
To complete the recipe in a time conscious manner, we decided on making the cupcakes first and whipped up the icing while they were baking in the oven. |
 |
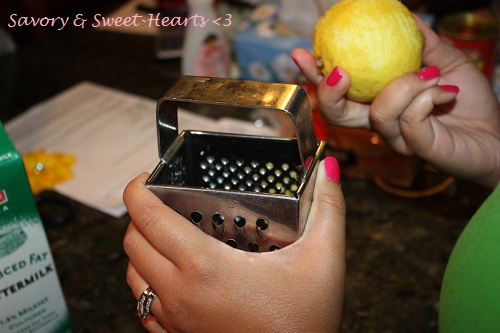
| No zester? No problem! |
We definitely suggest using a zester for the lemon peel if you own one, but if not you can use a cheese grater.
 |
| Nice & Smooth |
We were making these unique desserts for a party the next day, so we doubled the recipe from 12 to 24 cupcakes so no one would miss out on such a tasty opportunity! In theory, it seemed like the right idea, but we ending up having enough batter for 36 cupcakes total! We also added in a teaspoon or so of fresh lemon juice to the batter to amp up the citrus flavor and complement the zest in the batter. For those of you afraid of having too much of a citrus flavor, the lemon was definitely not overbearing in the recipe. If you aren't a big fan of lemon, try orange zest and a splash of orange juice!
 |
| Taste Test! |
Once the batter was finished, we spooned the cupcakes using an ice cream scoop for precision and ease. Many know this trick and it worked well for us. We did run into some problems with our cupcake holders though. They must have been made to fit Wilton baking tins, so it was sometimes difficult to not tip them over with the sudden weight of the batter. However, once the desserts were in the oven, they baked for exactly 25 minutes and when tested with a toothpick came out perfectly clean. If you would prefer a more moist consistency, we recommend to bake for about 20-22 minutes, or to your liking.
With the cupcakes in the oven, it was time to make the icing! The overall process was definitely easy. The only process new to Candee was simmering the whipping cream and cornstarch for the chocolate icing. The cornstarch is meant to thicken the icing, and left it with a gorgeous shine! Once the semi-sweet chocolate was melted in the mixture, we had our "black" half! The white icing was easy as well, although we ending up not having enough powdered sugar, so it became more of a glaze.But, after sitting overnight it had hardened so it was similar to the actual cookie. It also had a prominent lemony flavor, so for those who are not a big fan we would recommend cutting down on the lemon juice if that is how you feel.
 |
| Cupcakes Cooled and Icings Ready! |
All in all, the cupcakes were very simple to make and definitely aesthetically appealing as well as delicious. We received great feedback from guests at the party. The only mixed feedback we received was about the lemon flavor of the "white" icing. Our aunt was really surprised by the lemon, explaining that most black and white cookies do not have such a strong lemon flavor, but our other family members thought it was a nice twist on an old classic.
 |
| Are Those Cookies or Cupcakes? ;) |
Anyone from amateur home cook to professional baker could be capable of creating these black and white delights. However, many bowls, spoons, and other accessories had to be used multiple times throughout this process because we had to mix the dry ingredients, then cream the butter and sugar in another bowl, and then beat the lemon and the eggs and the vanilla in another. Thus, cleanup was not such an enjoyable task for two girls with no dishwasher...but I guess that's what hands are for! ;)
We are so excited to share our first (of many) Recipe to Reality posts with you, foodies!
Cooking is better with a cousin :)
Stay Sweet,
Candee & Jasmine